Replacing my Rear Stock Speakers on my 1994 Chevy Caprice Wagon.
Welcome to my write-up on how to install after-market speakers in your 1994 Chevy Caprice Wagon. This was an interesting project for me as I have never done any sort of automotive audio. I know it is not rocket science, but it is still unknown ground. Because I'm not experienced with this, use this as a guide although the project turned out very well.
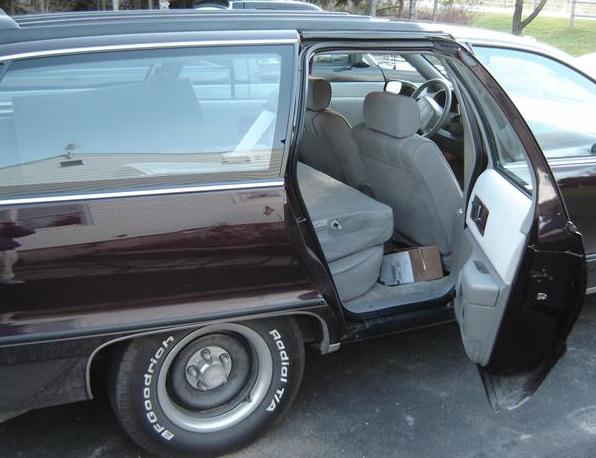
Below is my 1994 Chevy Caprice Wagon. It has a standard Delco AM/FM Cassette Stereo radio with 4 speakers. Two in the doors, two in the rear cargo area. While the door speakers are OK, the rear speakers were horrible. They weren't very loud (I had to have most of my front/rear bias towards the rear), weren't very clear, and vibrated the rear panels on really bassy notes.
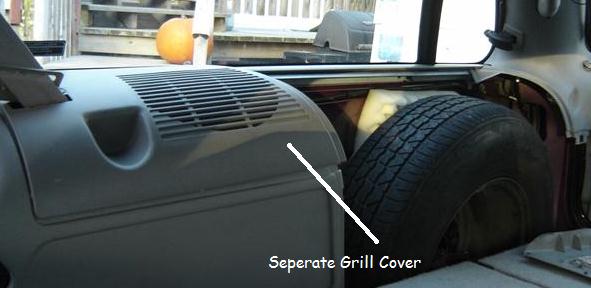
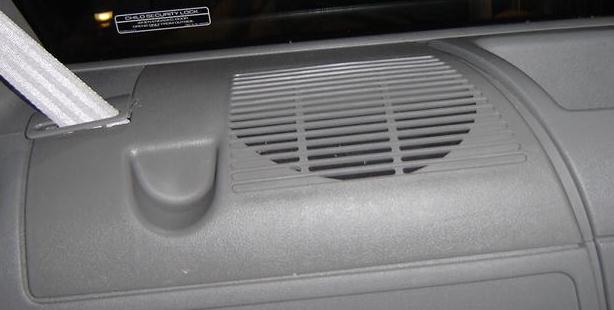
Below I have removed the rear spare tire cover, this allows for easy access to the right rear speaker. Opening this panel give you a view of how to remove the speaker grill which is easy.
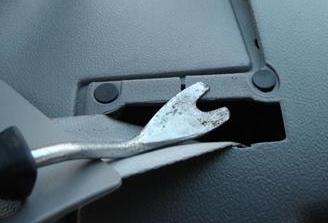
Moving the camera to where the spare tire is, you can see that the lower part of the speaker grill is held on by what I call easy clips. Taking a broad screw driver or even just pulling up with your fingers will release the bottom of the panel. However there are two panel clips under the seat belt access hole trim. Lift the little trim piece and you'll see them. Below I have a special tool to pull them up without damaging them,but a standard screw driver should do. Once those are popped out, the panel should lift up and pull out of a slot running along the base of the window.
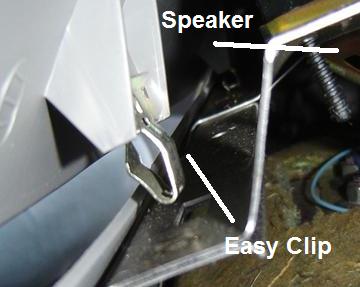
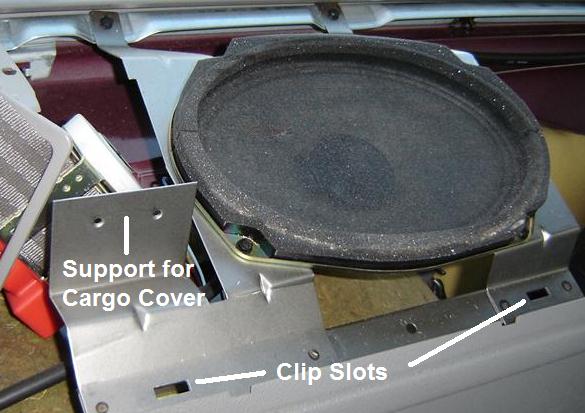
Once the grill is removed this is what you have. Some shaped sheet metal holding the speaker, the speaker, and if you have one, an area where your cargo cover support would bolt to. I don't have a cargo cover but the provisions are there for one. You can also see where those easy clips snap into the lower panel.
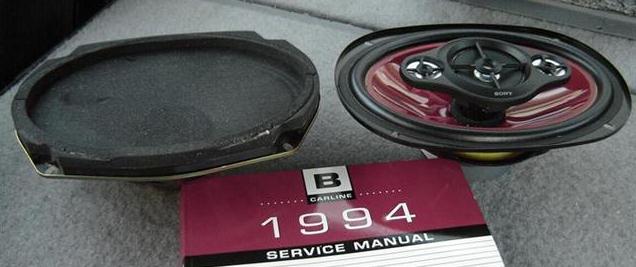
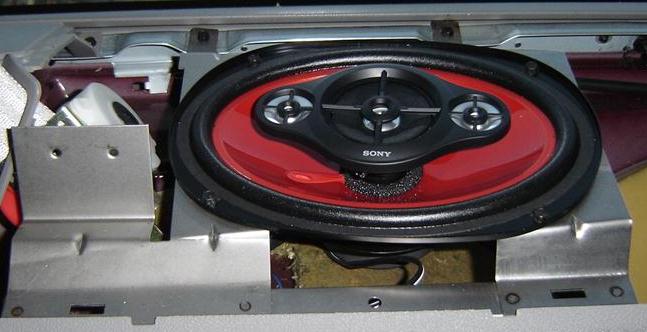
Removing the speaker is easy. Just unscrew the four screws and lift it out. Disconnect the plug and set the speaker aside. Below I have my old speaker and my new speaker. In this case, I purchased a SONY XS-R6941 "Xplod" 6"x9" speaker at Walmart. Don't bother searching for reviews, I couldn't find any and even the SONY website doesn't have a listing for it. It is probably a Wal-Mart exclusive and ran me $60 for a pair. It sounded great in the store and at this point, just about anything is better then the stock speaker. I found out that my old speaker even had a puncture in it. Also below is my service manual, a must for any upgrade/repair. Book 2 contains the electrical drawings I needed.
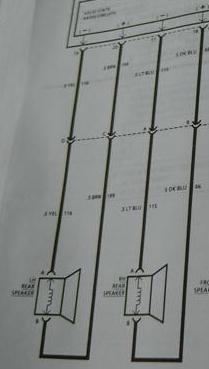
The drawings are needed because the factory speakers/wiring don't indicate which wire is positive and which is negative. For this, you need the service manual to find out which color wire is which and to make the correct connections.
In this case my right (passenger side) rear is (+) Dark Blue and (-) Light Blue. The left (driver side) is (+) Brown and (-) Yellow.
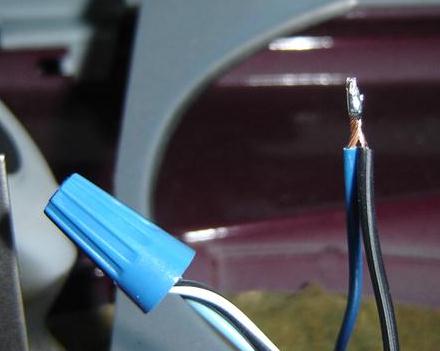
The factory connectors did not work with my new speakers, so I spliced in the speaker wire connectors with my factory wires. Here I have selected the correct wires and soldiered them together. I then sealed the deal with a wire nut. Note that the speaker (+) and (-) have different connectors on the new speaker, so be sure you match up the correct wires.
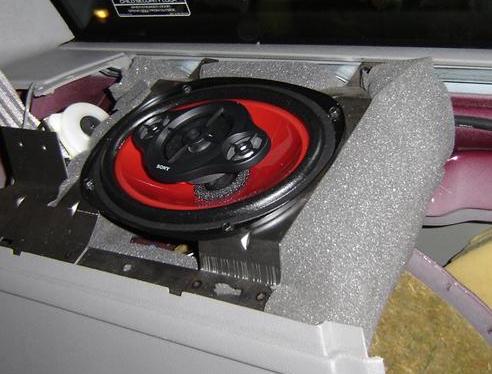
Below is the mounted speaker. At this point I went ahead and did the other side so that both speakers were connected and ready to go. A quick trial showed that both speakers were hooked up correctly but sounded like crap!!! The problem was all this tinny metal and plastic pieces were vibrating and distorting the sound from the speaker. This wasn't a big problem as I figured this open, unsupported design was one of the stock speaker's problems.
The speakers have just enough clearance from the body. Any deeper and we would have had to add spacers to lift the speaker.
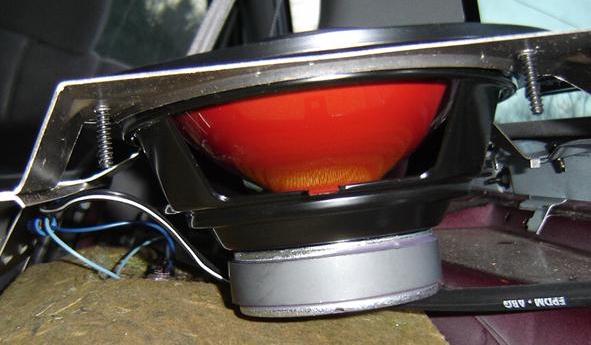
To stop this vibration, I got some 2" shipping insulating foam from work. It is squishy but holds it shape well. The original piece I took was about 3' by 3' and I only used about 1/2 of it. Using a sharp razor blade, I cut out pieces that would support the tinny metal and provide vibration suppression. I did all 4 sides of the speaker and really packed it in almost making a complete box.
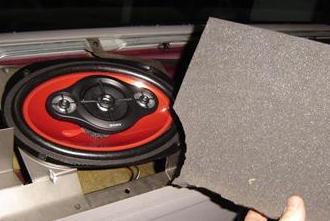
Below is the completed speaker. I did the same for the driver's side.
It really firms up the speaker support, just watch out for interference
with the cone of the speaker and that you don't get in the way of the panel
fit.
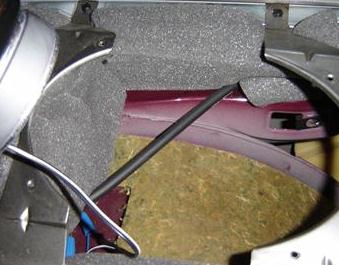
Below is the finished product. The radio now sounds 10x better then without the foam and sounds a lot better then the stock speakers. This isn't a cure all for a super sounding system, but it is a nice improvement over stock. One problem after the installation was the front speakers don't seem to sound so nice anymore...I guess they're next in line for replacement!
If you have any questions or comments, please feel free to contact me at TheReflex1@aol.com. I 'd appreciate a note if you used this article, it helps me to write other articles. Original created 12/02/2006. Thanks for reading. If you're interested in other HOW TO articles I've written, please visit the main page.