
Installing a Brand New Water Pump
This article is written to help you install a new pump in your 3.4L DOHC. It is my understanding that this is similar to 3.1 and 3400, but be sure to check your specific application. If linking directly to this article, this work is being done on my 1993 Pontiac Grand Prix 3.4L DOHC with 129,800 miles at the time.
The reason for changing my water pump started with a "whooshing" noise from under the hood. Over the time of a few months, it got progressively louder and louder to the point where you could actually hear it over the sound of the engine going down the road. Determined to find the noise I opened the hood but was surprised to find it wasn't coming from the transmission...it was coming from the accessory side of the engine. I dug out my Harbor Freight mechanical stethoscope and poked around the cams, power steering pump...then boom...the water pump! That thing was loud...time for a change!
Expecting the worse, as I always do with this engine, I was pleasantly surprised that A)It's cheap , and best of all, B) Changing the pump isn't that hard . A visit to my local Napa (Hampden Auto Parts) reveled that a rebuild pump with exchange was $17, but a brand new pump without exchange was $27...I went with the new pump. OK...lets start with our first picture...
Our goal is to remove the water pump...first step is to remove the coolant reservoir...(not shown in picture, already removed). It is held on with a 10 mm bolt and nut (nut is on the strut) and a few clips...just remove the bolts and lift straight up...the overflow tube connects to the radiator neck, just use a pair of pliers to remove the clamp and little hose. Next, drain the system. There should be a little plastic plug on the lower left of the radiator...open it up and drain it out. Now, move the accessory belt. I believe this requires an 18 MM wrench, the longer the better. Unload the belt via the belt tensioner and move it out of the way (replace if any cracks). Keep the wrench handy, we're gonna use it in a bit. Spray some PB Blaster on the four bolts holding the pulley to the water pump and wait...I waited about an hour, but do what you need. These are not super critical, so we can put some torque on them to break them free.
Once the soaking time is done, use your large 18 MM wrench and hold it across the front of the pump. Put your ratchet on one of the pulley bolts and turn until the wrench catches on two of the bolts...I didn't take a picture, so here is a diagram.
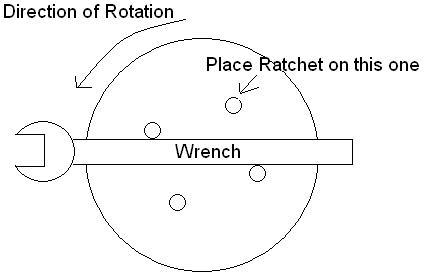
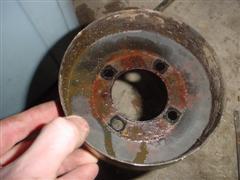
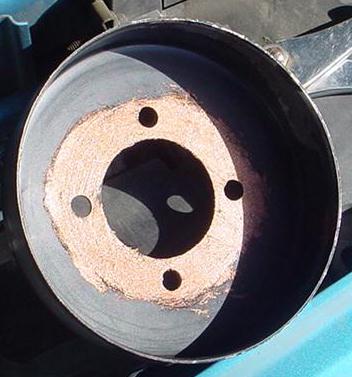
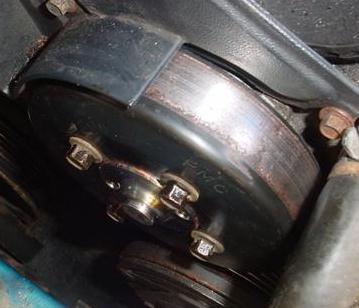
Use this to break loose all the nuts, not to remove them...once everything is loose, you can just remove the bolts by hand. Because the pulley has probably been here for a few years, 12 years on mine, it's almost glued to the water pump anyways. Spray some more PB Blaster on it and wait...that's what you should do...I wanted the thing off, so out comes the pry bar...since this is an old pump, you're not gonna hurt anything on the pump. That being said, don't damage the pulley, we're only trying to pop it off. We will need to reuse it. With some help, it should eventually pop off....and you'll get what is below...

Ok, now that your done laughing at all the rust on my car, we'll move on. Next step is to spray the pump with, you guessed it, PB Blaster. There are 5 bolts holding the pump on to the front of the engine. Spray these and the pump mating surface. I sprayed mine a couple times and soaked it overnight...why? Because the last thing in the world you want to do is break one of those bolts. The next day, use your 8 MM ratchet and loosen all the bolts...I'm not sure if it was because they weren't very tight to begin with or if the PB Blaster did it's thing, but they came out very well. I released them in a star pattern, just to be on the safe side to prevent putting too much load on any one bolt. Below is my only good old pump picture, of course, out of focus....
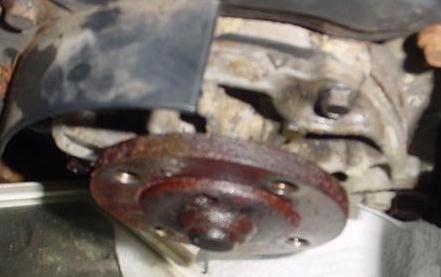
Now, the pump likes it's home...it's been there for a long time and doesn't want to leave...you're gonna have to help it move. Dig out the pry bar and between the pulley and the front of the pump, wedge it in there and convince it that pastures are greener elsewhere...a few hardy pulls should do it...it should pop out. What you'll get is below...they'll be gasket material you'll have to remove. I like plastic and wood tools as we are visiting Aluminum Land, and as we know all people in Aluminum Land are light weight but are easy to scratch...
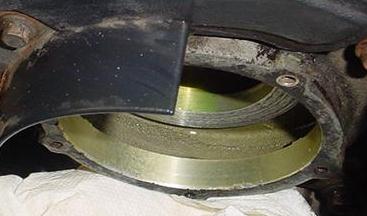
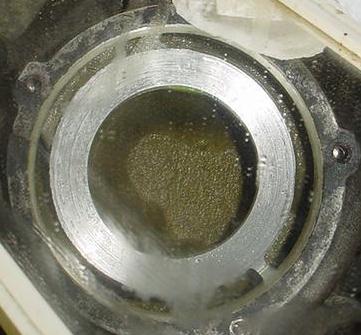
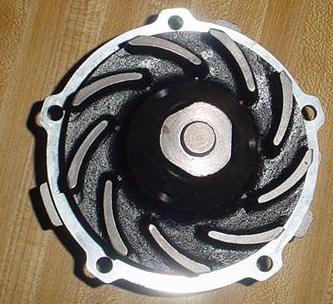
The right upper shot is through a mirror straight into the pump cavity. My old pump actually had quite a bit of play in it...and it seems it might have been nibbling in to the housing a bit...oh well. Once you have the gasket surface clean...it's time to start putting the system together. If the bolts you removed were dirty/corroded, clean them up on a wire wheel or wire brush...you'll thank yourself later. As expected, mine were horrible. Now, your new pump should come with a new gasket. It's not very thick...actually only paper thin, but it should do the trick. Before you use your Gasket Sealant (non-hardening, pliable kind), line up your gasket with the holes on your pump...they will only fit one way, so figure out the rotation and if you need to flip it or not (the 5 holes are NOT equally spaced apart). Put the sealant on the pump, place your gasket, then put sealant on the gasket and spread it about. Usually the instructions will ask you to wait until the sealant gets tacky before placing it on the car. Below is my new pump on the cupboard where I put on my sealant.
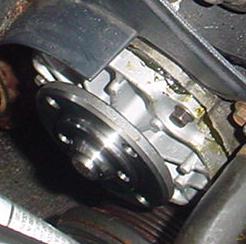
The pump should have an arrow on top of it...that indicates the top. When placing your pump back on the engine, this needs to line up. Gently place the pump into the hole and start threading the bolts back in...once you get them as far as they will go by hand, use your ratchet and using a star pattern, work the pump into the block. Your bolts don't need sealant, but anti-seize is always a good idea. You'll be tightening these bolts to 89 lb-in. (pound INCHES, not pound FEET). This is very light. I went a little tighter because of my old pump's nibbling of the block.
Let the sealant dry...how long...well the package doesn't say, but I'd say overnight would probably be best. I let mine sit for a week. The more the merrier, right? We need to install the pulley now. Clean the bolts and the pulley, which will probably be quite dirty, and apply some anti-seize to both the bolts and the pulley...hopefully we'll never have to do this job again, but the fool who does will appreciate your help.
Line up the pulley, start your bolts and get them hand tight. Use the wrench trick you used to get the bolts off to put them on again. They want to be 18 lb. ft. tight, which isn't that tight but it shouldn't fly off. By this time, we're close to done. Reinstall your belt, clean out and reinstall your coolant reservoir, and fill the system. I use a 50/50 mix of glycol/distilled water. My car has a special refill procedure that involves two vents, your car may too. Expect a drop in the reservoir the first week as air bubbles work themselves out of the system, but after that, the system should be tight.
You did it yourself and probably saved yourself a couple hundred bucks in repairs. Total cost of repair was $40!!! ($27 for the pump, $3 bucks for a new tube of sealant, $10 for new coolant, and I had anti-seize available already). I did this project at the same time as my Transmission Fluid/Filter change.
If you have any questions or comments, please feel free to contact me at TheReflex1@aol.com. I appreciate a note if you used this article, it helps me to write other articles. Original created 3/6/2005. Thanks for reading.